Yamaha XS650 Dual Disc Installation
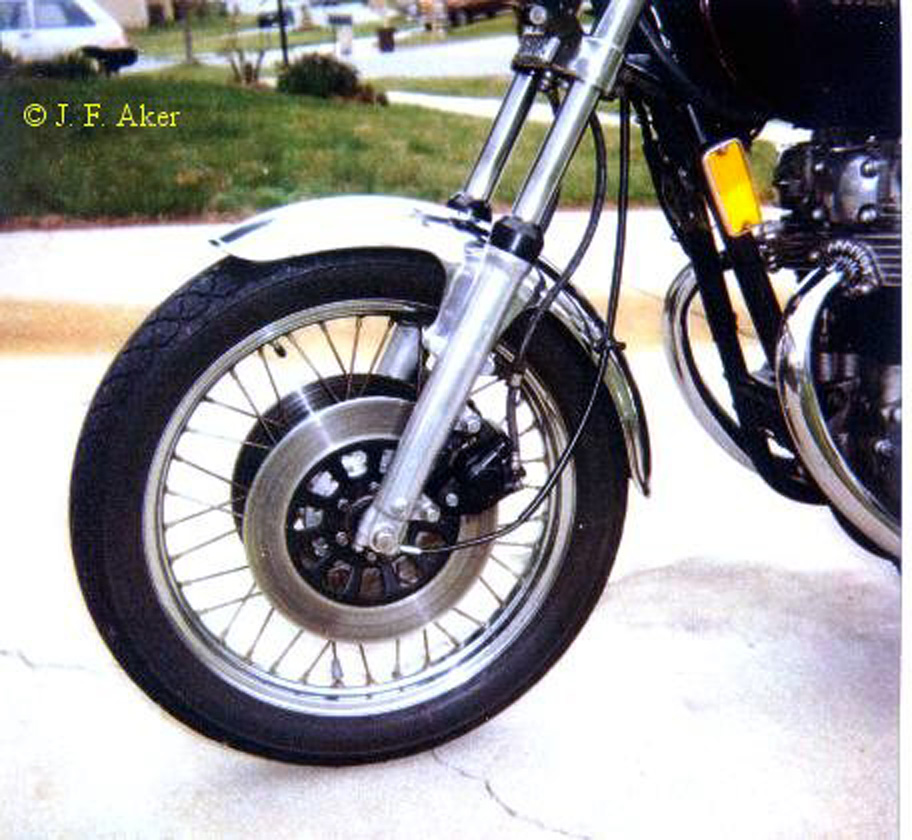
Most Yamaha 650s that were sold in the US have a single disc brake mounted on the right lower fork leg. Yamaha produced the XS650 for other markets with 2 discs installed and on most of the US models the necessary mounts and attachment points are already there. This primer addresses the 1981 H "Special II" model.
Yamaha redesigned the disc brake for the XS650 for the 1977 XS650D model. They went from a round caliper and 2-piece rotor to a rectangular caliper and one-piece rotor.
These parts are not interchangeable, but you can use the older style brake on any 1976 or earlier twin, and the later style on any 1977 or later model. The necessary hardware will be different for older 650s. Check the parts manual for your model. Most include a page showing a complete parts breakdown of a dual disc system.
First, you must determine if your bike has the required mounts. If so then you need to get a left caliper from a Yamaha with the same type caliper, like XS1100 and XS750 standard, XS400, SR500 or dual disc 650. The XS750 uses smaller front brake rotors so you'll need another XS650 rotor or another one that matches, like some XS1100 front rotors.
You will also need a double banjo bolt and XS650 lower brake line. Try and get all the parts with the necessary fasteners, especially the fender mounted left hose retainer. The brake lines from any bike will work as long as the banjos match and the hose is the correct length. When attaching the brake line check the right side for the correct orientation of the banjo's angle offset. Remove the front wheel and pry off the plastic cover from the hub. This will reveal the 6 tapped holes for the brake rotor. Bolt the rotor in place using either the stock curved washers with bolt tabs or a couple of drops of lock tight (blue) on each bolt. Torque the bolts to spec (15 ft-lbs on my '81H) and remount the front wheel.
Bolt the left caliper to the mounts on the left lower fork leg and torque to spec (25 ft-lbs). Place a rag to catch the fluid beneath the brake line junction under the headlight. Remove the bolt that secures the lower brake line. Place both banjos from the lower legs on the double banjo bolt. The junction has tabs to orient the brake line banjos. The left hose banjo went on top of the right one on my '81 H model. Don't forget the put a copper washer between the banjos and one on each end. Tighten the double banjo bolt (19 ft-lbs). Remove the cap on the master cylinder and open the bleeder Ľ to ˝ turn. Add brake fluid as needed and bleed the left caliper and line until no air bubbles are released.
The overnight bleeding method is very effective if you can wait til the next day to ride. Close the bleed valve and fill the master cylinder. Close the entire brake system and bungee the brake lever fully back against the grip. Let it sit overnight. The pressure in the system will force the air that remains to rise to the top. This usually requires the master cylinder to be refilled, but works surprisingly well. Russell Performance Products makes a replacement bleeder called a Speedbleeder®. This bleeder features a stainless steel check ball that allows air and fluid out, but closes and will not let anything back in. I have used them with much success on my old Yamahas. They also make braided stainless steel replacement brake lines for most bikes, including the Yamaha 650 twin and 750/850 triples. A link to their web site is on my Links page.